While I have some other articles on how to set your camera for success in the rain forest this one specifically aims at the editing of the raw files. I will use one of my frog images shot in Costa Rica during one of my workshops to demo how I edit the raw file from start to end. If you are interested in knowing the workflow after raw conversion, please watch this video here. So without further ado lets jump into the nitty-gritty of things –
Why shoot Raw (always!) – Post-processing or editing is the digital equivalent to developing an exposed film in the darkroom. Nowadays, almost all photographers are post-processing all their images in any of the numerous raw processing software available to get maximum control over the output. Today I am going to try and give you a perspective that you don’t usually hear from wildlife photographers who shoot in the blessed savannahs of Africa or the mecca of wildlife photography in India only because they are blessed by the gods of light. What makes me different from most of my fellow bird and wildlife photographers is that I shoot in the tropical forests in Central and South America where there is perpetual cloud cover, rains, and hardly any sunlight. Incidentally, the best times to shoot birds in these locations is during the rains, which makes it incredibly challenging technically to get the perfect exposure for every shot! This is exactly why shooting RAW is the best bet when the light is not on your side. You can not only recover details while editing but also have control over color correction, contrast, and white balance and push the capabilities of your modern camera to its limits.
In my previous blogs, I have already mentioned how to set your camera to get a perfect shot in the rain forests. This article will give you a well-rounded perspective on post-processing images workflow taken in the damp and dense rain forests of Central and South America.
Step 1: Transfer the file to editing software you are using, whether it is Lightroom or Photoshop
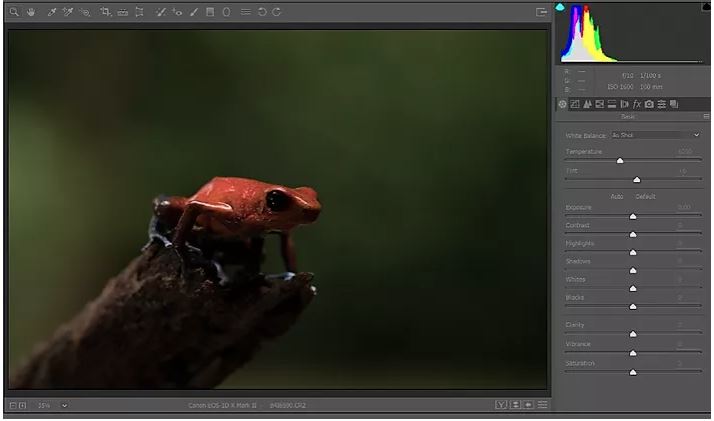
I use Adobe Bridge to sort my files, which I feel is the most powerful tool for this purpose. I am using the image of a vibrantly colored poison frog with very saturated tones accentuated by a green background as an example. With the amount of natural light available I made this image using a Canon 1dx mark II body and a Canon 100mm F2.8 L lens with the following settings – 1/100, F10, ISO 1600, without using any flash. As you notice, it is impossible to use flash to get a perfect image of this frog if you are shooting in JPEG simultaneously trying to get everything in the camera.
Ditch the idea of getting the right image all at once in the camera and instead post-process each image to get the best results. Don’t feel guilty about editing your image, you are not creating something fake, but improving on your present image.

Step 2: The Basic
This is one of the most crucial phases of my entire digital workflow since it provides me with the flexibility to correct all the mistakes I have made while shooting on the field. Clients often ask me what white balance one can use while on the field. It is best to be your own critic and choose between the options available in the dropdown. If the white balance is set properly then only little adjustments are required in terms of temperature and tint.
While exploring options in exposure settings one must remember that the RAW file is already stacked with images from the shoot and it can stretch the workflow limits in terms of exposure. If you study the two images given above and try to differentiate between them based on details present, you will notice that the dark portion at the top of the image was altered with one slider in RAW mode. That’s the power and magic of RAW files!
While playing around with the exposure tools you can move the workflow, contrast, highlight, and shadows sliders to recover the dark and underexposed parts or reduce highlights and whites from the ‘burnt’ white part of the image. Once you do that, you will see how the histogram has moved right indicating there is no clipping in either white or black. The white and black sliders work similarly with which you can tweak the image according to your judgment.
Please note that this blog is to show the power of raw files and not necessarily how I would edit my file for the final presentation.
I usually avoid clarity since it usually adds some sharpness to the image workflow which is a process I usually do at the end of the process after all my editing and resizing are completed. A touch of vibrance to push the colors a bit and I move on to the next toolset.


Step 3: How to Adjust the Tone Curve
This is a very easy step that does not require a detailed discussion. All you must do is reduce the highlight slightly and pushing the details a bit.


Step 4: Handling the Detail Tool
I generally don’t touch the detail tool very much. It is usually set at 25,1,25,0 for sharpening the image. I use a different sharpening tool right at the end of the editing process. The reason I use the sharpening tool is two-fold, first being that sharpening adds “noise” to the image or maybe a texture and makes it look defined. The other reason being to make sure the NR process happens on a smaller file size thereby reducing editing artifacts.


Step 5 & 6: Adjusting the Grayscale or HSL
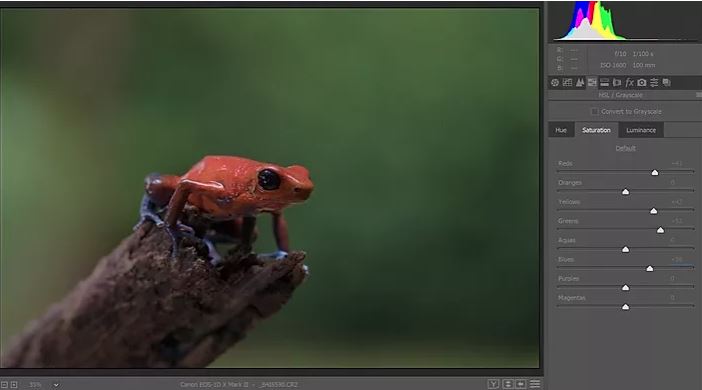
This is one of the most essential parts of the digital raw workflow as it involves color management. Through this tool, you can add a pop of color where required or tone it down if it seems too much. For instance, you can adjust the saturation of those colors you think can make the image resemble the natural surroundings in which it was shot. The trick here is to adjust in a way that the onlooker can’t even guess the image was edited. Since the camera can’t see or register like the human eye and brain, it is imperative to adjust those settings while editing. In this image, I have adjusted the red, green, and yellow colors by pushing the respective sliders that indicate each of these colors to accentuate the green background. This method is called color correction and it is applicable for video editing as well. It is very tricky as well as you tend to overdo it a bit. The whole point is to keep the image natural just as you shot it in the wild bird photography tour.
You can always revisit your image in hourly intervals in between edits to check if you have overdone some colors and then tone it down. This trick helps in overall editing as well.

 After the color correction is done, the Luminance slider needs to be adjusted. This slider helps to reduce the brightness of the colors selected by the photographer. Sometimes a photographer can face a situation in which he or she has overexposed or underexposed a scene based on the light on the subject. For instance, If the background is bright yellow then you can push the yellow slider to the left to reduce the brightness of the background making the image more pleasing. In the image you can see how the green and red colors are balanced to offset the extra light falling on the frog, thereby improving the contrast. As you can see the vibrantly colored frog stands out against the deep green background.


Step 7: Split Toning
This tool is used frequently by the landscape photographers to add the artistic finishing touch to their images. However, I have rarely used this tool while editing as it is not applicable to wildlife and bird photography.


Step 8: Lens Correction
In this phase of editing, you can correct the mistakes your camera lens has introduced to the image like vignette and chromatic aberrations. In most cases, the lens profile is automatically selected for most cameras and lenses, but if it is not, you can select your gear from the drop-down list. Check the boxes against the CA or vignette while editing. However, it is advisable to leave the correction amount untouched.


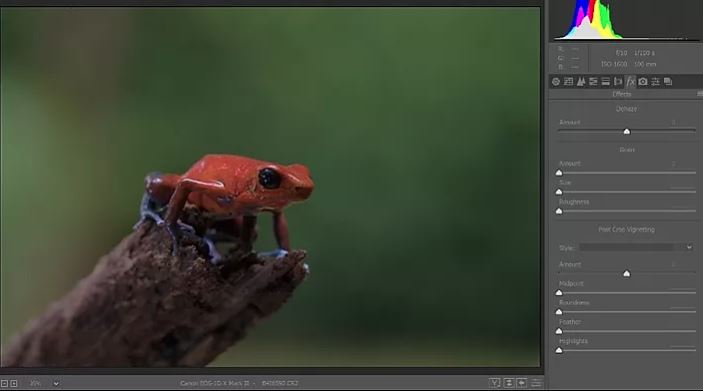
Step 9: Adding Effects
My raw workflow ends in step 8 after which I start file editing. The camera calibration, presets, and snapshots are left untouched.


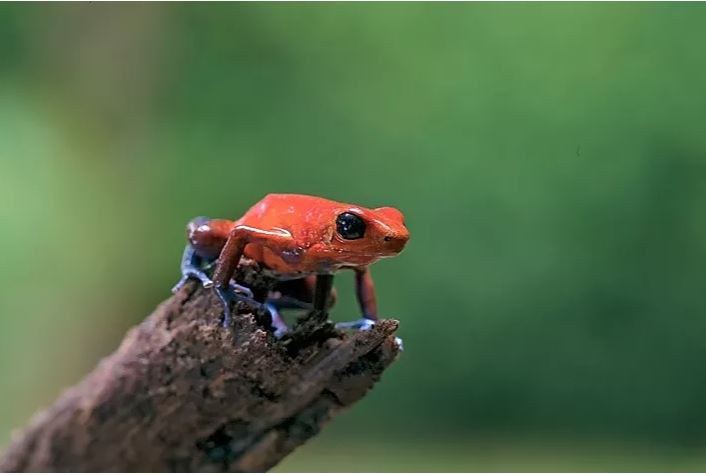
These two ‘before’ and ‘after’ images shot in jpeg will surely underline the importance of shooting RAW and post-processing all your images. Understanding the power of raw will make you a better photographer overall as you start to push the technology for which you have paid good bucks! Remember a good digital image is ‘made’ not ‘shot’.
BEFORE

AFTER

If you like this blog subscribe to my newsletter where I share more info like this along with images and updates from my trips to Central and South American rainforests. Happy clicking.
Email us at info@tropicalphototours.com for questions 🙂

